With the release of macOS Sonoma, Apple has made a dramatic change to how users manage screen savers. This post will focus on the end-user experience, and other posts will focus on how to manage this from the IT perspective.
macOS Sonoma makes these changes:
- Screen Savers can now be set on a per-monitor basis
- Wallpaper (a desktop background image) can be set on a per-monitor basis (this is not a new feature, but see #3)
- Some screen savers and wallpaper can be used either as a screensaver or as wallpaper or both, in what’s internally called a “linked” mode
The User Interface (UI) and User Experience (UX) for these new features are somewhat confusing, especially if you are used to prior versions of macOS.
We’ll start with the easy modes, and work our way up to more complex ones.
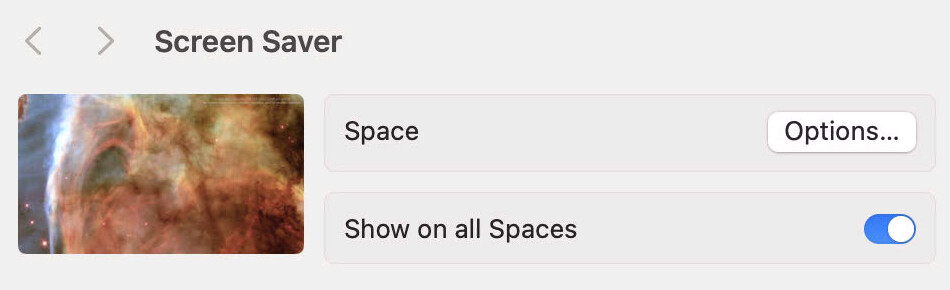
Show on All Spaces
When using a third-party screensaver, on a system with 2 or more screens, the simplest option is to choose Show on All Spaces. With this checked, the screensaver operates as you expect from prior versions of macOS: there is one screensaver and it runs on all connected screens.
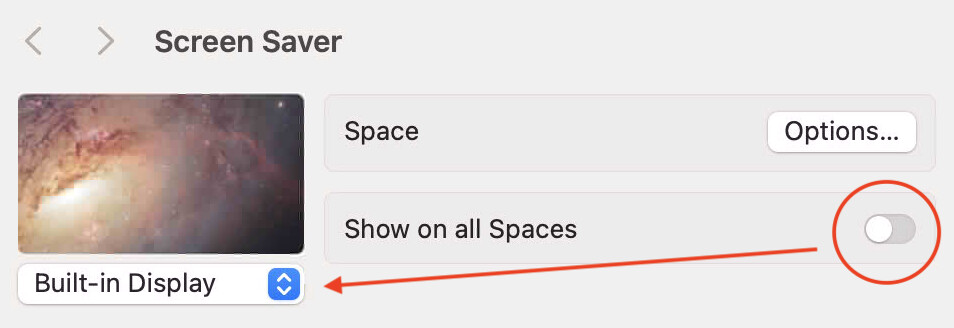
Different Screen Saver per Screen
On a system with 2 or more monitors, if you turn off Show on all Spaces you reveal a new popup, which has the name of each display on it.
Using this setting, you can toggle between your displays, and choose a different screensaver for each monitor
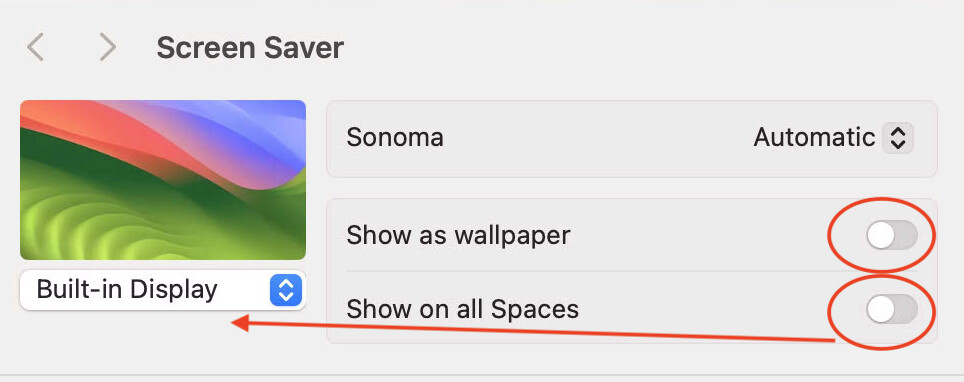
Show as Wallpaper mode
In macOS Sonoma, some screensavers (but not all) have a hidden ability - they can run as both a screensaver or as wallpaper (desktop background). Apple calls this “linked” mode internally.
When you select a screensaver with this dual ability, it reveals yet another hidden UI checkbox:
Thus, at its most complex, macOS has quite a number of variations:
- Show on all Spaces: runs the same screensaver on all screens (on a multi-monitor system)
- Per-screen screensavers
- Running a screensaver as Wallpaper (linked mode) - only available for selected Apple screensavers.
This adds a lot of complexity and room for confustion!
But we aren’t done yet - to make things even more complicated - you can also edit some of these settings from within the System Settings / Wallpaper UI. as shown here
